How to Use Magnetic Painting Thickness Gauge?
When measuring the coating on the ferromagnetic metal, a magnetic painting thickness gauge can be used. The magnetic induction principle is also the most extensive non-destructive thickness measurement principle among the principles of coating thickness detection. This measurement method can be used to measure the electroplated layer, paint layer and various coating thickness on the surface of various steel parts. This time we will briefly introduce the use of the magnetic painting thickness gauge by measuring the galvanized layer thickness on the surface of iron.
I. The role of galvanized metal
In production activities, a common process when galvanizing steel surfaces is usually to protect the steel from corrosion. Steel is easily oxidized when exposed to air. The galvanized layer can protect the ferromagnetic substrate. Zinc plating also accounts for nearly half of all plated parts. It is the most frequent plating layer in electroplating.

II. Magnetic painting thickness gauge LS225+F500
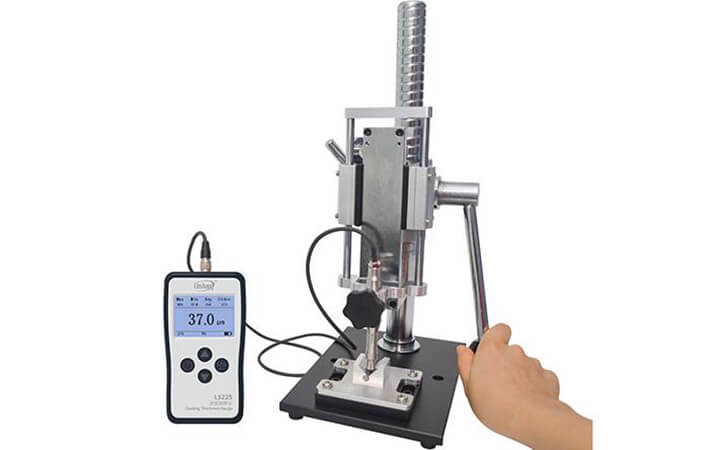
The LS225+F500 coating thickness gauge is a thickness gauge that uses the magnetic induction measurement principle. The main features are as follows:
The ultra-small probe probes can be used to measure various small workpieces and heterogeneous materials
It supports 1-5 point calibration with an accuracy of ± (0.3μm + 2% reading). Ultra-thin coatings under 10μm can also be accurately measured.
Use a test fixture for measurement, data repeatability can reach ± (0.8% reading + 0.1μm)
With data statistics function, through multiple measurements and recording data, you can calculate the maximum, minimum, average value and standard deviation of the previous 9 data.
III. How to use the magnetic painting thickness gauge?
1. It is recommended to observe the size and appearance of the plated parts before the measurement. If the plated parts are small or irregular, it is recommended to use a test fixture for testing. This time we measured a galvanized hardware with a small size and cylindrical appearance, so we used a jig to test.
2. Before calibrating the magnetic plating thickness gauge, you can preliminarily estimate the coating thickness on the surface of the screw. You can get an initial thickness value through experience or by using the measurement before 2. calibration of the instrument. Then select a standard piece whose thickness close to the coating thickness gauge.
3. After the calibration is completed, place the plated piece on the fixture steadily, control the test probe by pulling the wrench above the fixture and complete multiple measurements. From the display interface of the LS225+F500 coating thickness gauge, you can see the maximum, minimum, average and standard deviation of multiple tests. Through these data, we basically know the thickness of the galvanized layer on this plating.
- High precision coating thickness gauge for used car
- Automotive paint protection films coating thickness gauge
- Plating Thickness Measuring Instrument for Detecting Anti-corrosion Coating
- Linshang LS220, LS191, LS160A– Necessary for Car Cover Inspection
- Coating Thickness Gauge for Second Hand Vehicle
- Zero Adjustment Step of Coating Thickness Gauge
