How to Use Paint Thickness Gauge?
There are various paint thickness gauges on the domestic and international markets. The operation methods differ from different brands. The paint thickness gauge is mainly used in the automotive industry. Today, we take the Linshang LS220B paint thickness gauge as an example to introduce the operation method of the paint thickness gauge. The operation method is as follows:
1.Scan the QR code on the LS220B paint thickness gauge user manual to download and install the mobile phone app.
2.Open the APP and display the “Linshang” logo for 3 seconds. If there is no bound bluetooth device, then enter the bluetooth setting interface.Click "(Start Search)", prompt "(Searching for device...)" and list the available bluetooth devices that are searched; click the "(Stop Search)" button to stop searching for Bluetooth devices and the search indicator icon disappears. Selecting "LS" + gauge serial number will bind the selected gauge (prompt: each gauge has a unique serial number).
3: If the APP has a bound bluetooth device, the logo interface will appear for 3 seconds then automatically search and connect the bound Bluetooth device. When the connection is successful, it will automatically enter the “(Measurement)” interface and display the information read by the gauge.
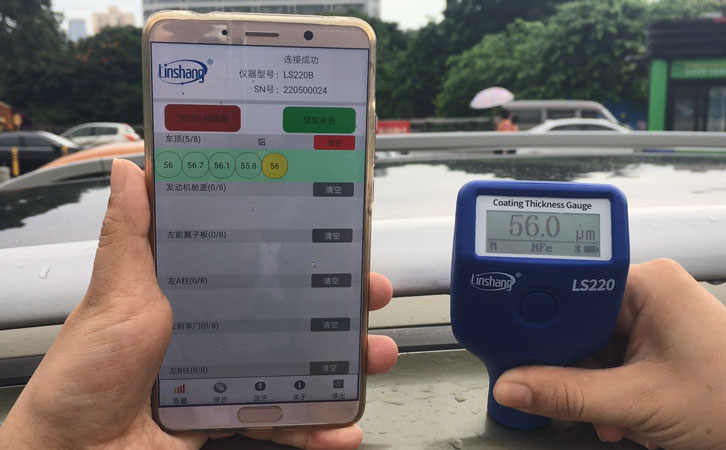
LS220B bluetooth paint thickness gauge test the car roof
Select the corresponding car position in the APP project bar to measure, the measurement data will be uploaded to the selection bar and the latest measurement will be highlighted.
A.Each project bar can preserve the latest 8 sets of measurement data.
B.There are 17 projects totally for different parts of the car. (From top to bottom: car roof, engine compartment cover, left front fender, left A-pillar, left front door, left B-pillar, left rear door, left C-pillar, left rear fender, trunk lid, right rear fender, right C-pillar, right rear door, right B-pillar, right front door, right A-pillar, right front fender).
C.The specific part name of the car that we test will be displayed at the upper left corner of each bar.
D.The “(Empty)” button corresponding to each project bar can clear the measurement data of this bar.
E.Select the “(Clear All Data)” button in the upper left corner to clear all measurement data and automatically return to the first bar to prepare for measurement
- High precision coating thickness gauge for used car
- Automotive paint protection films coating thickness gauge
- Plating Thickness Measuring Instrument for Detecting Anti-corrosion Coating
- Linshang LS220, LS191, LS160A– Necessary for Car Cover Inspection
- Coating Thickness Gauge for Second Hand Vehicle
- Zero Adjustment Step of Coating Thickness Gauge
